Traditional Art Week
Heya awesome people! I'm back with another issue of watercolor guide for beginners!
 In the last issue I promised to explain about shading in watercolors and some tricks to enhance your watercolor paintings. Some basic resources will also be explained in the article, and I hope you'll like this article too! So, without further ado, here's the index:
The Index:
- Introduction
- Shading
- Materials required and Functions
- Some tricks to enhance your paintings
- Few resources
- A word of THANKS.
...................................................................................................................................................................
So Here We GO!
..................................................................................................................................................................
In the previous article of mine, you saw a progressive artwork with the use of base paints and how to start painting; in this issue, you'll get to know about how to paint using only one shade and how to shade accordingly. That is how to shade without the use of colors like black and white and how to execute your process of painting with a limited palette. This will also include managing the use of colors in specific areas of your paintings. I hope everything is clear and concise till now; we now move on to learn more about shading.
With the usage of the word shading so frequently in the introduction, you may be wondering what is a shade exactly. According to Wikipedia, a shade can be defined as the mixture of a color with black, which reduces lightness. For example, this image from Wikipedia's image library will help you in understanding about shades:

In the above image, various shades of the blue color are shown.

Given below are some important and helpful resources/ tutorials you can find on Deviantart!


Introduction:
In the previous article of mine, you saw a progressive artwork with the use of base paints and how to start painting; in this issue, you'll get to know about how to paint using only one shade and how to shade accordingly. That is how to shade without the use of colors like black and white and how to execute your process of painting with a limited palette. This will also include managing the use of colors in specific areas of your paintings. I hope everything is clear and concise till now; we now move on to learn more about shading.
Shading:
With the usage of the word shading so frequently in the introduction, you may be wondering what is a shade exactly. According to Wikipedia, a shade can be defined as the mixture of a color with black, which reduces lightness. For example, this image from Wikipedia's image library will help you in understanding about shades:
In the above image, various shades of the blue color are shown.
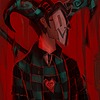
- Shades: While painting with watercolors, and even other mediums, you look for the painting to be composed of more elaborate and vibrant details. Such details need not always be via drawing lines or hatching along the edges to make it look like a cluster of shades, but it can also be done using watercolors; For example
Here in this painting, I've marked two boxes that highlight the use of shades via hatching and via watercolors. In the first box (the one in white border), you can see the use of hatching over the edges of neck and the shoulders. This is done to give it a good dark shade and create come contrasts to increase the visual appeal of the painting! In the second box (the ones in black borders), I've used the shades of the same color with varying opacity.
- How To: Shading in a Watercolor Painting
In a watercolor painting, shading can be done by various methods. It can be done by adding more water to an existing painted spot (wet), adding dark shades of the same color to the painted spot (can be dry also) or adding light shades and continuing the painted spot (wet). These methods can be verified by having a look at the following examples;


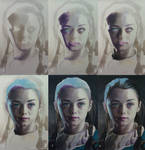
- Shading with a limited palette:
Consider yourself in a situation where you only have one color in your palette and you have to create a painting with only one shade. What will you do? Here's the solution! Use water to adjust the density of paint used in each layer of your painting and adjust the amount of paint on the brush in accordance to the level of water. For example, if you want a dark shade of the same color, add more paint and less water in the paintbrush, whereas if you want a lighter, less denser shade of the same color, add more water and less paint. The process shown below will help you understand the use of water more clearly and efficiently.


- Types Of Colors:
Colors can be divided into two types, warm and cool. Warm colors mostly have more density of color than the cool colors. Therefore, they're used mostly in shading your artwork. Some of the common warm shades are shown below;

( credit: cindyrobsonstyling.com.au/wp-c…)
Consider all these as your color palette or as a key to paint good shades!
( credit: cindyrobsonstyling.com.au/wp-c…)
Consider all these as your color palette or as a key to paint good shades!
Materials Required and their Functions:
Given below is the list of necessary materials required for shading in a watercolor painting;
- Water (used for creating varied density of paint)
- Paints (both warm and cool shades)(used for painting)
- A Handkerchief and a straw (optional)(used for adding special effects)
- Paintbrushes(used for applying paint on the paper)
- Your concentration
") (this is the most important thing)
(this is the most important thing)
OK, so now that you've got to know the list of required materials, we now move on to adding some special effects in you painting using shades and some other materials.
Some Tricks to Enhance Your Watercolor Paintings:
Till now, we've learnt a lot about shades; so how to make your paintings a lot more attractive so that they pop up in front of the viewers and catch their eyes? Most of you may consider giving some Photoshop touches, but some other traditional methods also work as good as the digital methods! I'll explain only three methods in this edition but more will be explained in the last edition of the series! So, here we go!
- Using Handkerchief
So, how do handkerchiefs contribute to attractive looks of your paintings? It's simple, they help in absorption of excess water in a particular area and at the same time, provide a good texture to the painted base. This can be shown in the following example-


- Using Straws
Straws can also be used for various watercolor blast techniques as the one shown in the process below. These blasts make your artwork look more cool and fill it with a new set of emotions! all you need to do is blow through the straw over wet paint and see the magic happen! For example:
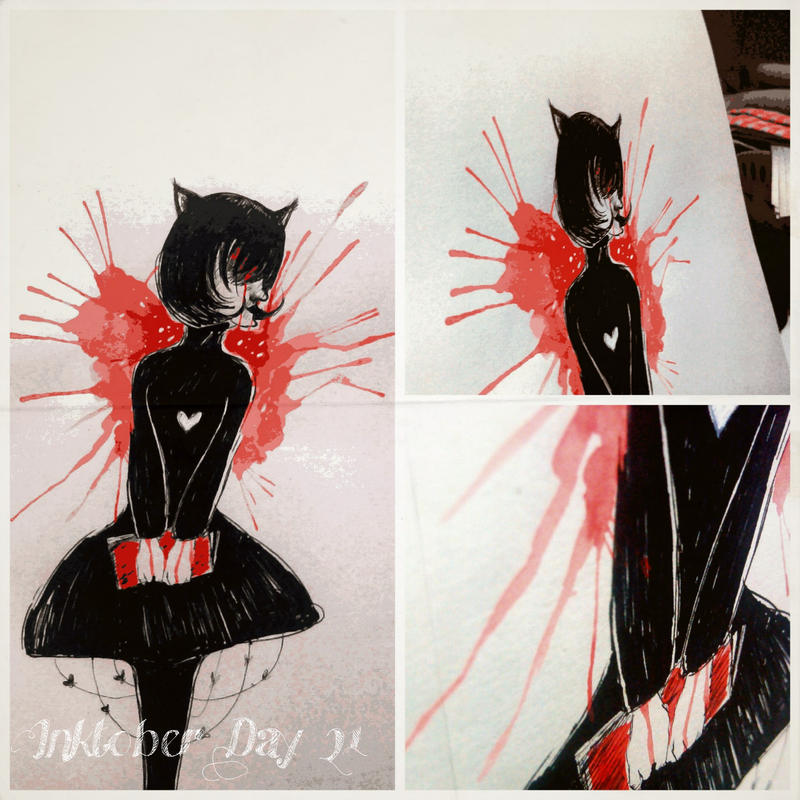
In the above painting of mine, all I've done is that I've applied wet paint over the exterior of the main character and then blown the paint with the straws in the direction where I want it to be spread out.
In the above painting of mine, all I've done is that I've applied wet paint over the exterior of the main character and then blown the paint with the straws in the direction where I want it to be spread out.
- Using Toothbrush
Tooth brushes make a great tool for splatter painting. They can be used to make a huge number of drops of a variety of sizes at once. I've explained their use in this tutorial of mine.
Few Resources
Given below are some important and helpful resources/ tutorials you can find on Deviantart!
.............................................................
So here we come to the end of this article and I hope you all liked it!

....................................................................................................................................................................For more info and questions, you are free to note me up! You may also ask in the comments if you have any queries! 
...................................................................................................................................................................
I thank all of you, my friends, the editors, the advisers and all the other staff people for helping me out in bringing up this article! If you hadn't been there, this article wouldn't have been a successful one! KEEP BEING AWESOME!
................................................................................................................................................................
article written by Tudalia-Hex for projecteducate's Traditional Art Week
All the images of painting processes were presented to you by Tudalia-Hex

...................................................................................................................................................................
A word Of Thanks!
I thank all of you, my friends, the editors, the advisers and all the other staff people for helping me out in bringing up this article! If you hadn't been there, this article wouldn't have been a successful one! KEEP BEING AWESOME!
................................................................................................................................................................
article written by Tudalia-Hex for projecteducate's Traditional Art Week
All the images of painting processes were presented to you by Tudalia-Hex
Thank You


